

thingsrbetterwithaparrot.typepad.com/homegrown-wedding
Handmade signs are a simple and functional addition to your wedding decor. Not only do they add a certain fun, vintage ambience to your wedding, they also serve the important purpose of making sure your guests know where to go.
We recently made a simple version of our own so we could show you just how easy this really is!
The ideal material to use is recycled or aged wood. However, we didn't have any lying around so we opted to buy some inexpensive wooden boards from our local craft store.
Tip: For the most inexpensive options, check the section of your craft store where model airplane/car building supplies are located. These thinner, light weight pieces of craft wood are perfect for gluing to a post with basic wood glue. You can also glue a nice ribbon to the back of the craft wood as a hanger that should hold just fine. However, if you want to attach a metal hanger of some type that requires puncturing the wood, we suggest going with a thicker option found at a hardware store.
Because this wood is brand new and doesn't have that vintage charm we love, you will also need some wood stain or brown paint to create a quick "aged" look. Tip: Check the local hardware store for returned/sample/mistake paint that is often good quality and extremely discounted. That is where we found our bucket of brown paint for just a few bucks!

To achieve the vintage look use the wide bristle brush to make long sporadic strokes across the board with your dark brown paint. Be sure to leave some of the natural wood exposed so the desired affect is achieved.

While you wait for the brown paint to completely dry, begin to conceptualize what you want your signs to say and what type of font you'd like to use. First think about the functionality of the signs: Will your guests be relying on these signs to point them in the right direction? What is the best way to communicate what you want them to know?
It is also very important to think about how big the font needs to be for your signs to be clearly visible. For example, if your guests will need to see your sign from a main road where the speed limit is a bit higher, then make sure your font is bold and large enough. However, if your guests will be viewing the sign in a drive way where they will be going more slowly then you may not need to use such a large font. By the same token, if your sign will be placed on a walking path, then you can use an even smaller font and possibly write more. Just remember that keeping things short and sweet is often the best bet.
If you want your signs to look more rustic choose a print font that is imperfect.

weddingbee.com
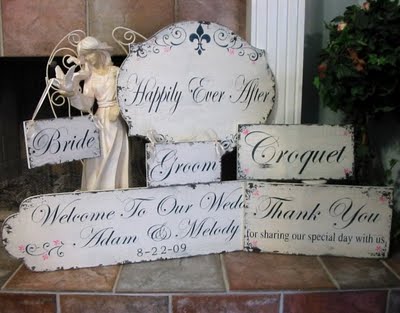
Now for the fun part! Get creative and come up with interesting ways to tell your guests what to expect. We chose to mark the reception driveway with a sign that says: "Dinner and Dancing". We have also seen "Party Here". We really like "Happily Ever After Starts Here", "Here comes the bride", or "From this day forward" for ceremony sites. We also like "Slow: Cocktails Ahead" for showing your guests where to find drinks and food.
You can also simply put your names with a heart or plus sign and the date. Or, you can put "Mr. and Mrs, ____. established (your wedding date)". This can be a great keepsake to hang in your home as a reminder of your special day.

For our sign, we chose an off white paint to give it a little bit more of a vintage touch. We chose a thick, large font so the sign would be clearly visible from the driveway. We also accented the font by making the ends of the letters a little wider so they would feel a bit more fun!


That's basically it! Simple, fun, and inexpensive -our favorite kind of project! Of course, you can get more creative than this and add ribbons, more colors, etc. depending on the look you are going for, the amount of time you have and your creativity comfort level.

Thanks for visiting our blog, please also check out our website at www.vintageandlace.com and like our Facebook Page: Vintage and Lace Wedding Specialists for other tips, tricks and projects to make your wedding day one-of-a-kind!
And, as always, feel free to contact us with any questions or comments, or to learn more about our Wedding Planning Services!
Rachael@vintageandlace.com
Note: If your signs are going to be outdoors for an extended period of time or you want them to last for years to come, we suggest spraying them with a protective gloss or coating.
No comments:
Post a Comment